Manage - Configure Dialogue Studios
Announcement
Anywhere365 Partner Portal has been rebranded and rebuilt as AnywhereNow OnePortal Formerly known as Partner Portal. A redesigned web portal for managing Dialogue Cloud deployments. and has gone live on 17-04-2025. Updated documentation and screenshots will be added over the coming weeks. All menu's and options of Partner Portal can still be found in OnePortal albeit in a slightly different place or look and feel.
Dialogue Studio Configurations Overview
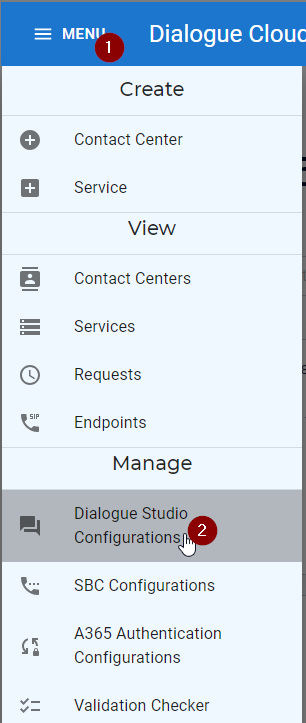
To manage your customers Dialogue Studio Configurations, you can browse to the Dialogue Studio Configurations "Tile".
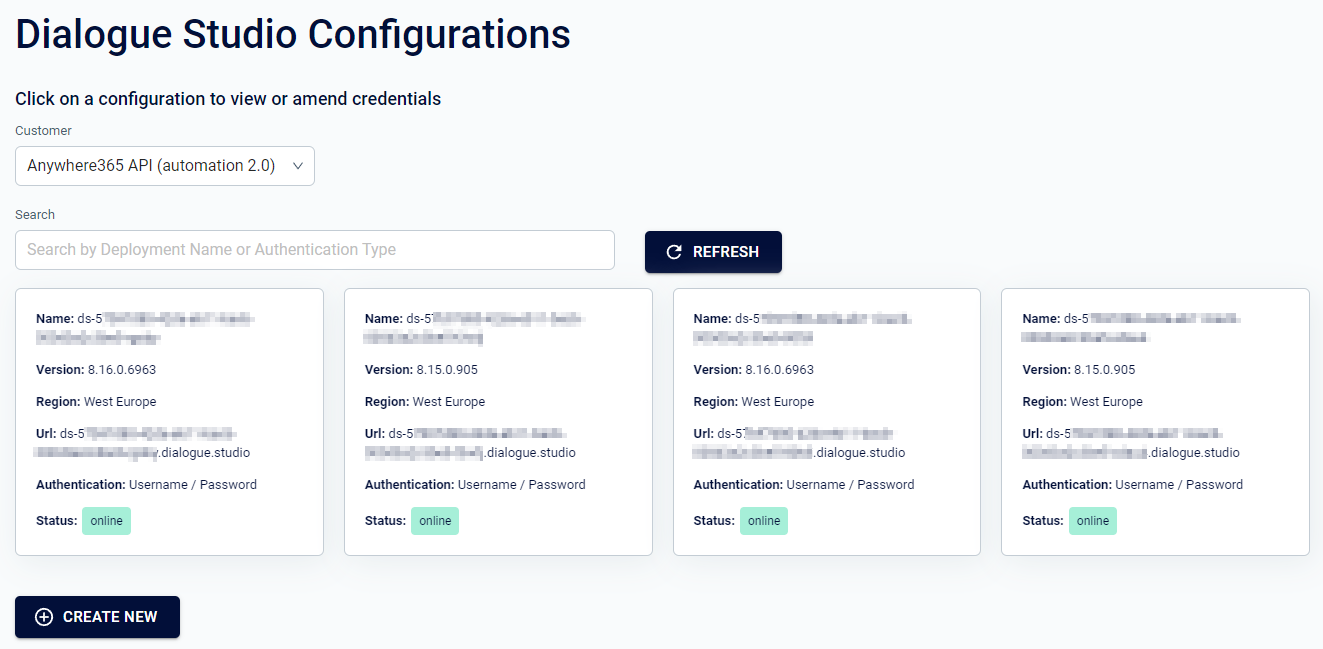
The page which opens will look like below and shows all available (if any) Dialogue Studio Configurations available for the selected customer.
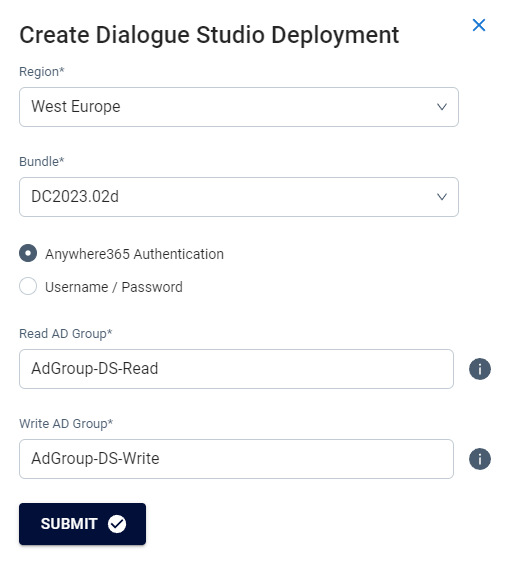
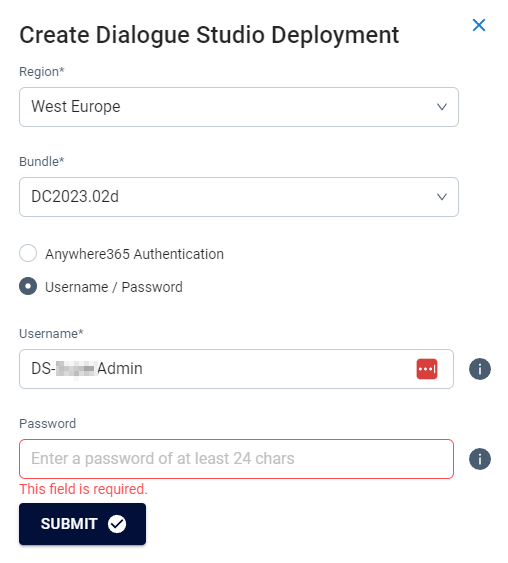
Create a Dialogue Studio
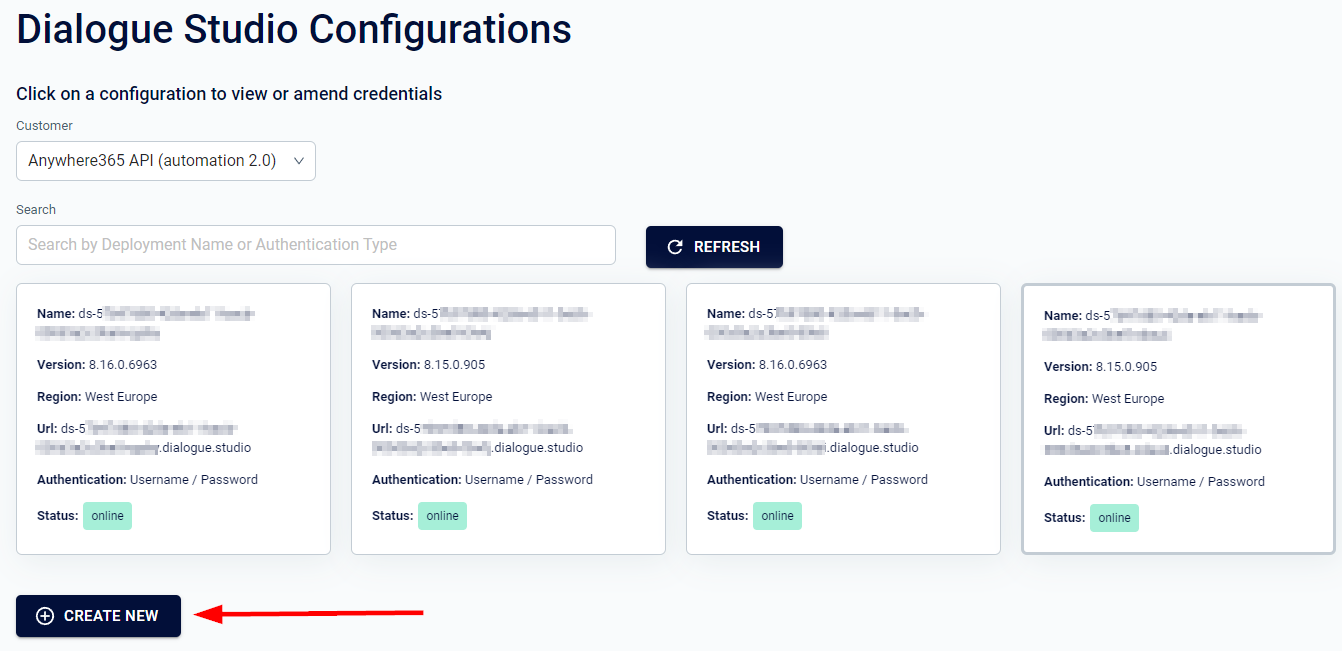
To create a new Dialogue Studio Configuration, select the Create New button.
The following window will pop-up on screen. Here you must select the Region, the Bundle version and the authentication type. Base on your selection of authentication type, you either must give in the AD Groups for read/write via the AnywhereNow Authentication system, or you can use a username and password type of authentication.
When selecting Username / Password, you must use a 24 character password.
Change Dialogue Studio Configuration
After selecting one of your Dialogue Studio Configurations, you have the options to;
-
View the URL
-
Update the Dialogue Studio Configuration
-
Change the Authentication type
-
Change the Password
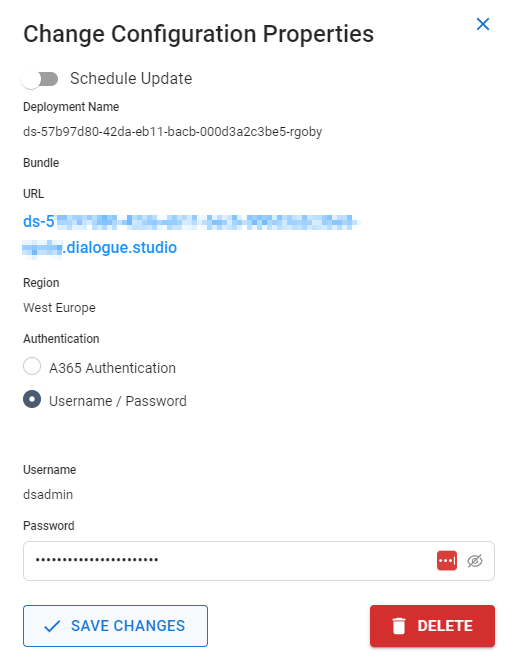
After making changes to the authentication type or after changing the password, you must hit the Save changes button in order to have our API make the requested changes.
Update Dialogue Studio Configuration
When you need to update the Dialogue Studio Configuration with a new bundle version, you can open a Dialogue Studio Configuration and select the Schedule Update slider.
The following will be displayed

The next step is to select a date and time for the update to take place.
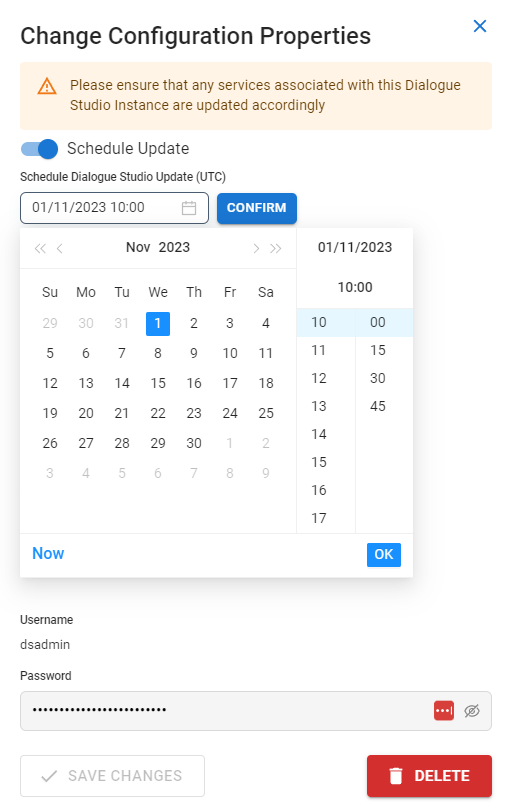
Once you have selected a date and time or chosen for Now, you must hit Confirm to schedule the update..

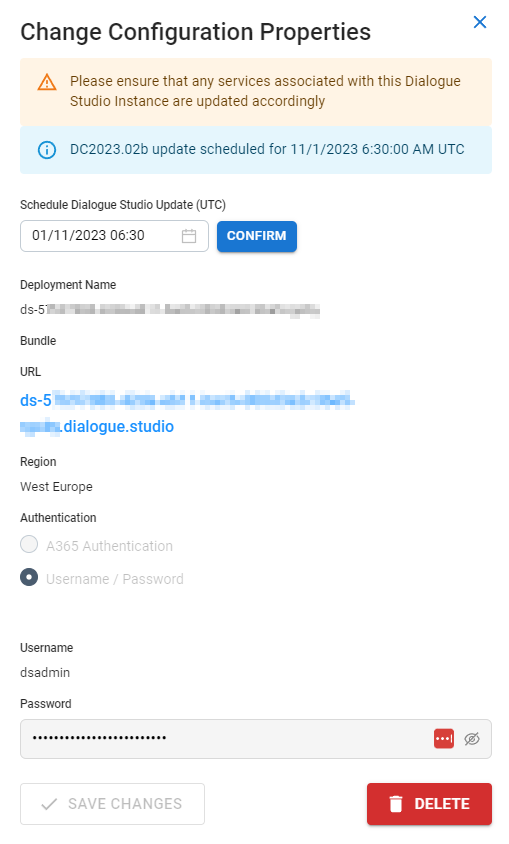
After confirming the update, the following will be displayed.
You can always review and/or cancel the scheduled update, via the Requested Actions page.

To cancel the scheduled update. Select the Scheduled icon and the following pops-up.
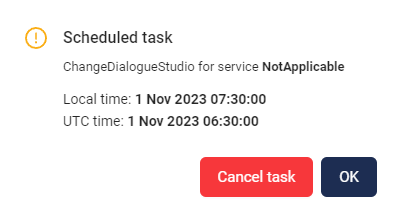
Hit OK if you do not want to make changes. If you need to cancel the update, you may hit the Cancel task button.
Once done, the requested actions page will show ‘deleted’ on the line for the Dialogue Studio update.
