Secure Vault
Introduced in DC2025.01
Introduction
Secure Vault lets you save secure credentials in a vault. Dialogue Cloud Neo applications can then access specific resources in your tenant through your Microsoft Entra ID Formerly known as Azure Active Directory (or Azure AD, or AAD) service principal.
You can create a secure locker in Secure Vault to store credentials for applications and services configured for use or integration with Dialogue Cloud Neo. Secure Vault initially supports Azure SQL Database connection strings, with authentication credentials for other applications, such as CRM Customer Relationship Management, or CRM, is (usually) a software-based, data management method to deal with interactions with customers and potential customers., planned for future OnePortal Formerly known as Partner Portal. A redesigned web portal for managing Dialogue Cloud deployments. and Dialogue Cloud Neo updates.
Prerequisites
In the customer Microsoft Entra ID tenant
-
Create a Service Principal (=App Registration) in your Microsoft Entra ID Formerly known as Azure Active Directory (or Azure AD, or AAD). Also See: Option 3: Create Microsoft Entra ID Service Principal for App Only Access with Secure Vault
Warning
only use [a-z][A-Z] in App Registration name, otherwise creating login in SQL database fails without escaping the name
-
Create a Secret for the above created App
-
Grant the Service Principal access to new (or existing) database. Run below queries using Azure Data Studio or SSMS:
CopySQL Queries
USE master; CREATE LOGIN "<AppRegistrationName>" FROM EXTERNAL PROVIDER
USE <AnywhereNowDatabase>; CREATE USER "<AppRegistrationName>" FROM LOGIN "<AppRegistrationName>"
ALTER ROLE db_owner ADD MEMBER "<AppRegistrationName>"
-
Consent to the multi-tenant Enterprise Application from the AnywhereNow-managed Dialogue Cloud Neo tenant.
-
The same Enterprise App is reused for SharePoint Online connections from Dialogue Cloud Neo. See Step 1: Granting consent to the Dialogue Cloud Microsoft Entra ID Enterprise App. If you granted consent to this app previously, this step may not be necessary. It is harmless to grant consent to an Enterprise App more than once.
-
Tip
You can start creating a Secure Vault while on a lower bundle A bundle is a fixed combination of our software platform elements of very specific versions. These are designed and tested to optimally work together to assure their intended function and interoperability. but enabling it for your Service(s) and Contact Centers can only be done from Bundle DC2025.01 or higher.
Create a Secure Vault
Note
Please note that a customer will have to use 1 Secure Vault per Region
In OnePortal, go to:
-
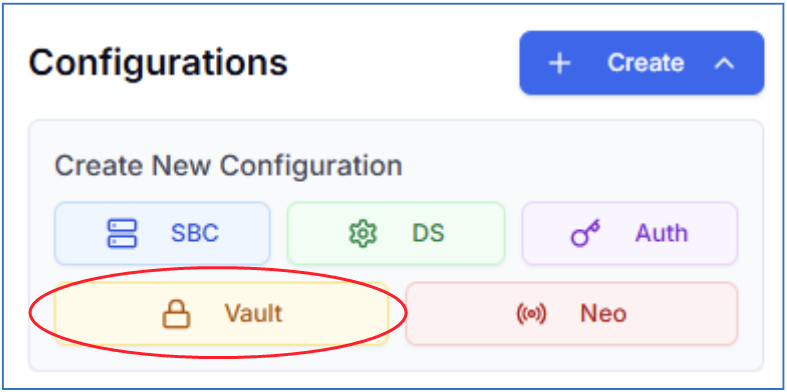
Configurations,
-
select Create,
-
select Vault
-
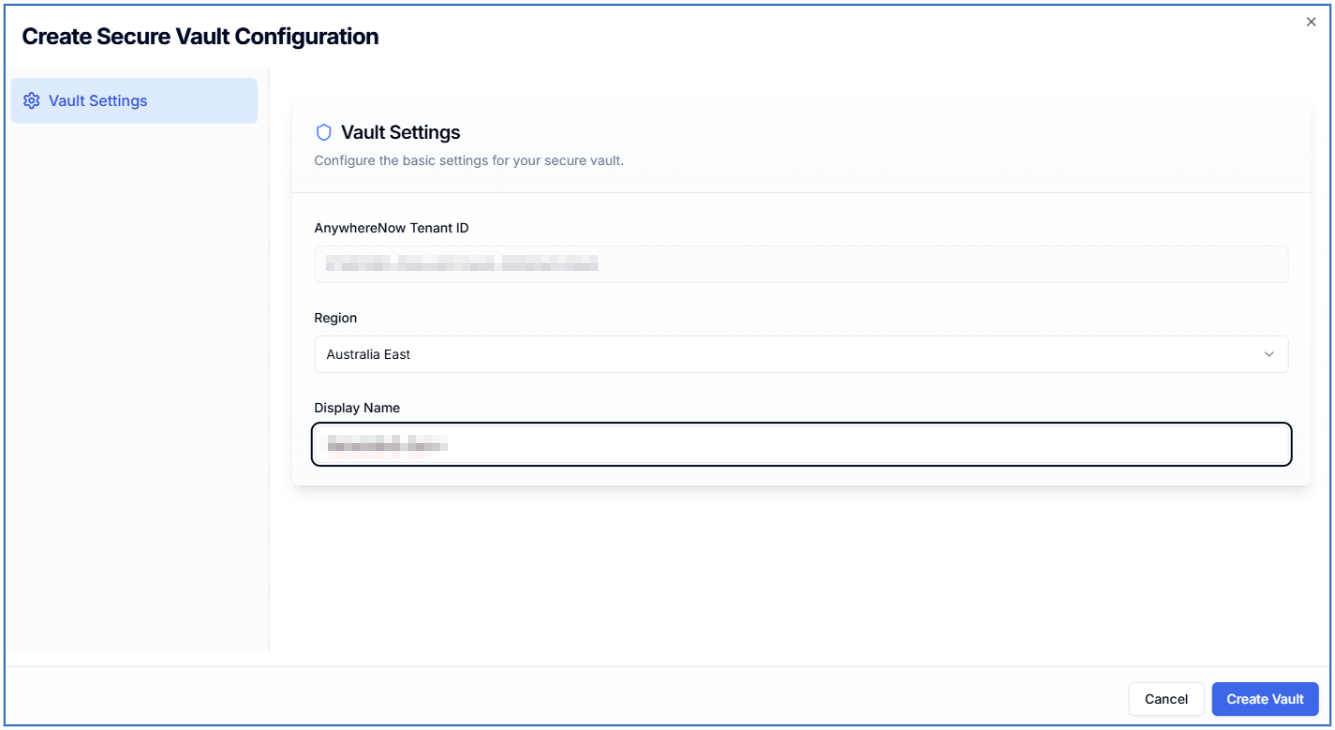
Select your desired region and choose a display name and select Create Vault.
-
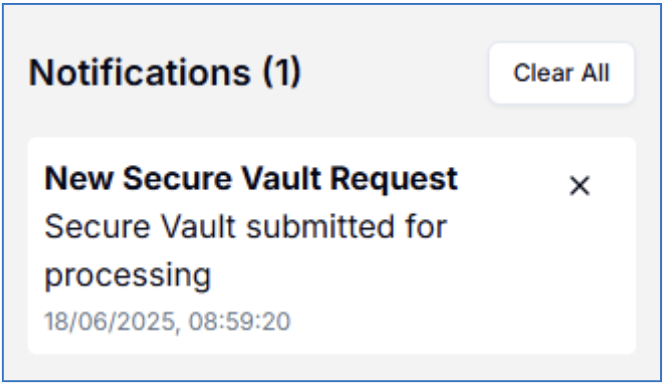
On the notifications pane you will now see a message regarding the creation of the Secure Vault
-
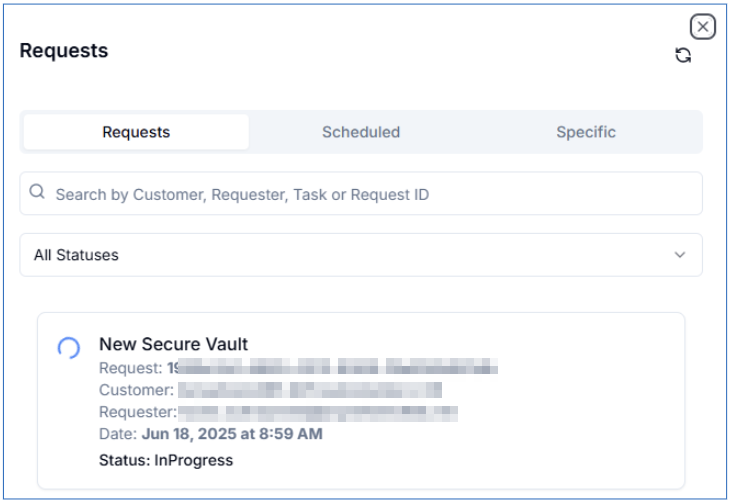
The requests pane will now show the requested Secure Vault being created
-
Once the Secure Vault is created, a notification will appear.
-
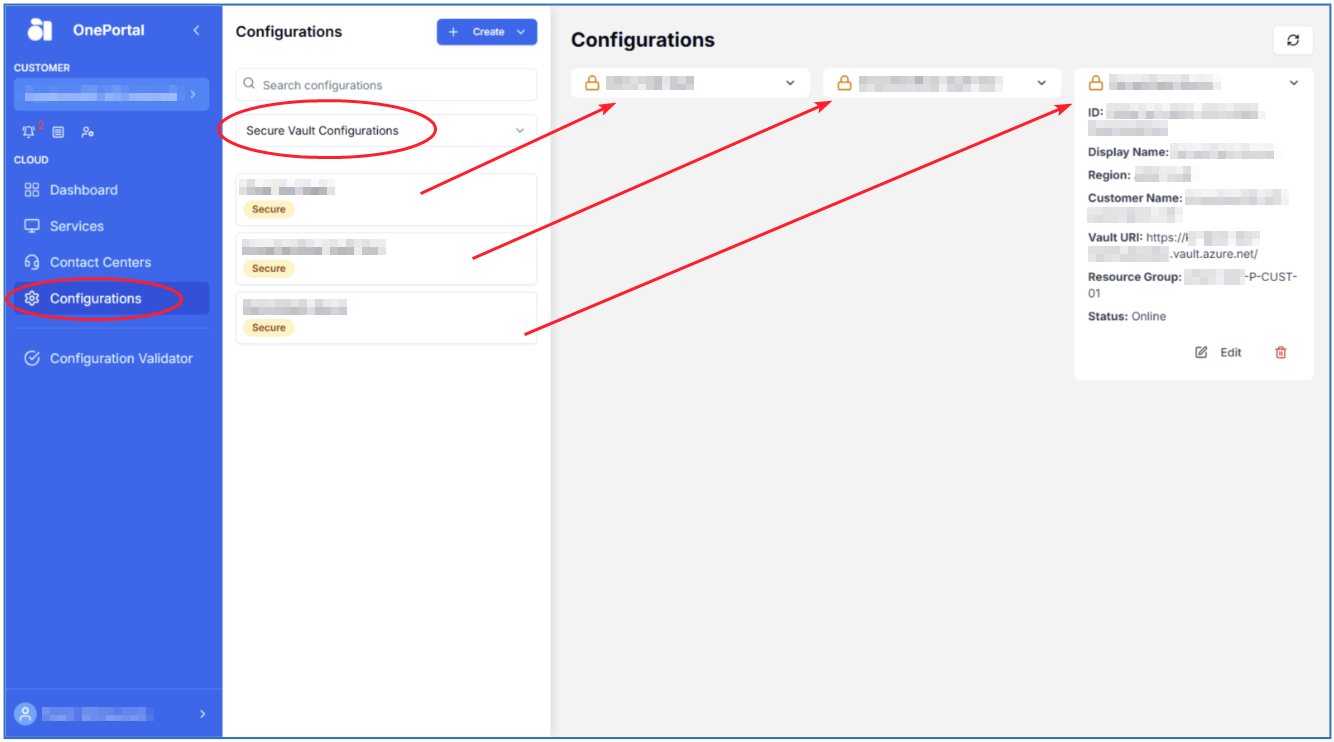
Your Secure Vault will now appear underneath the Configurations section of the OnePortal.
Filling the Secure Vault
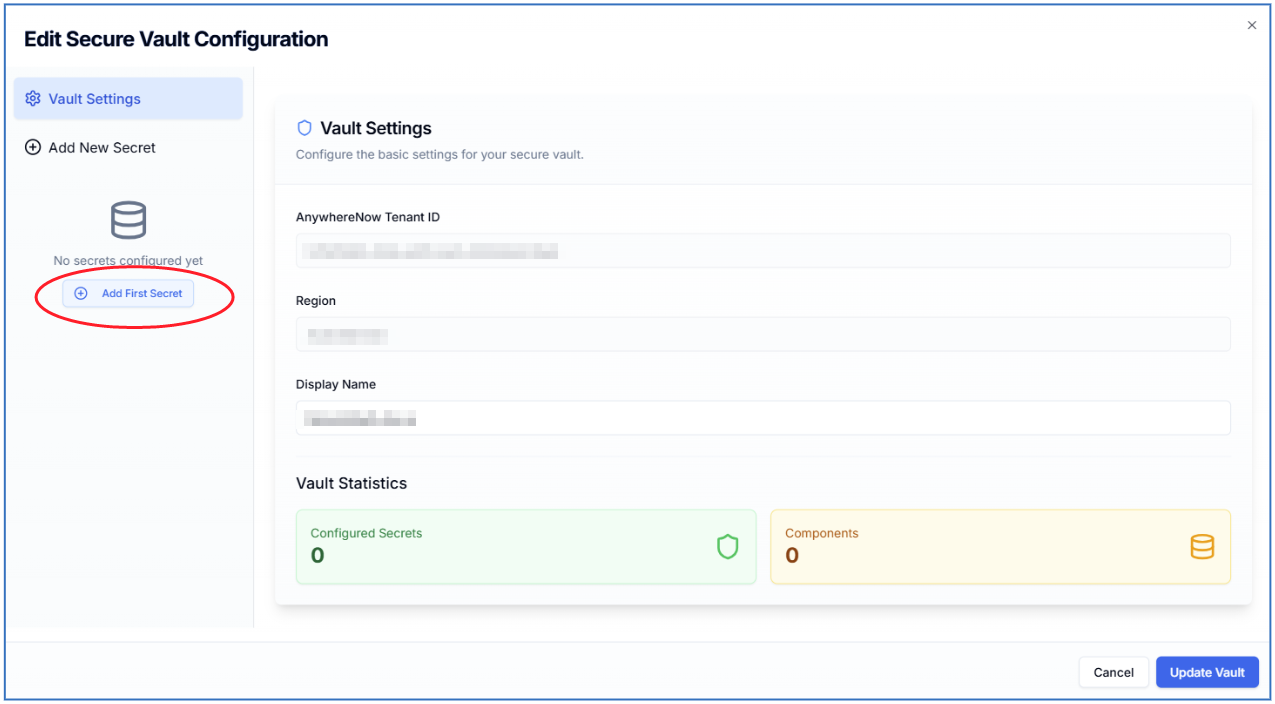
You can now select Edit to start filling the Secure Vault with your secret profiles (hereafter Secrets).
Note
For the release in DC2025.01 only SQL related secrets (i.e. SQL Azure connection strings) are supported.
-
To begin, choose Add First Secret or Add New Secret

-
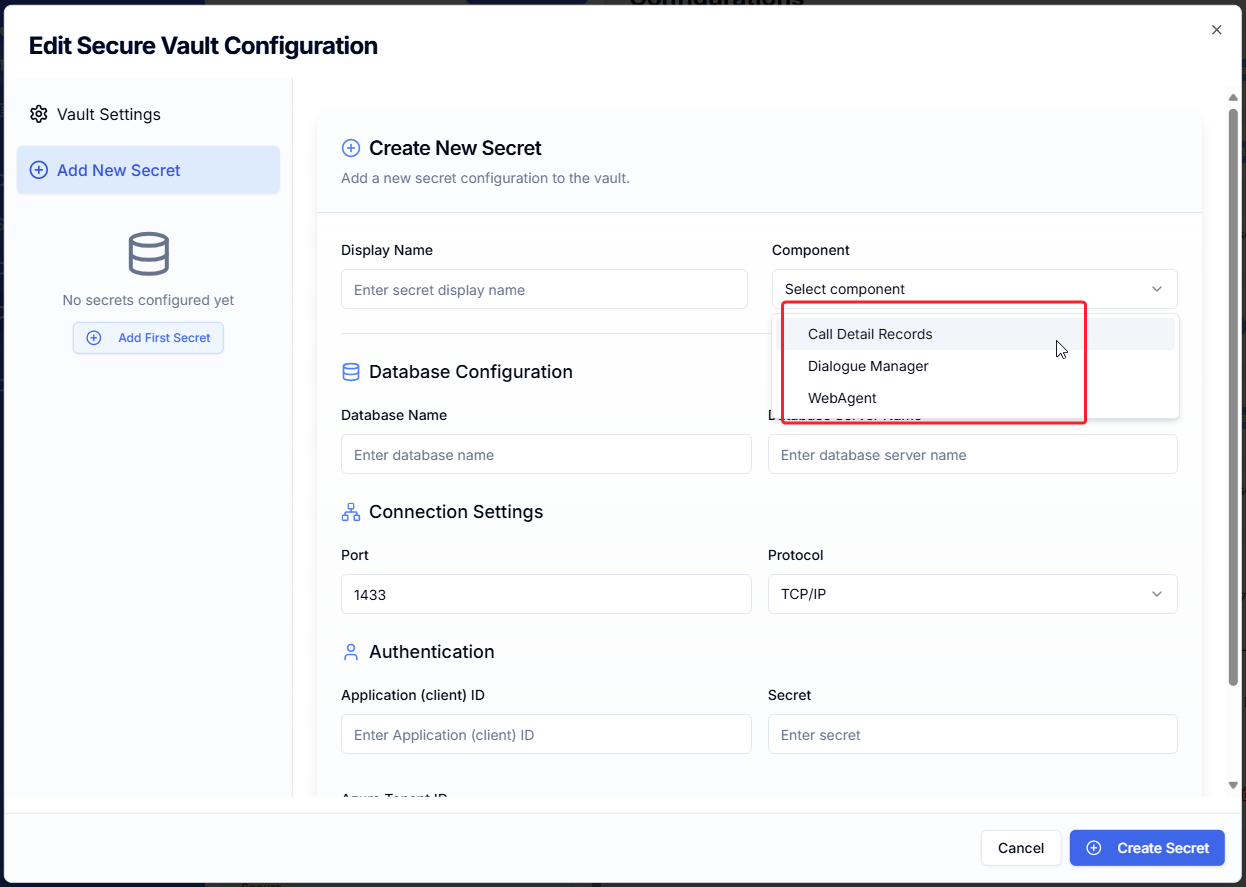
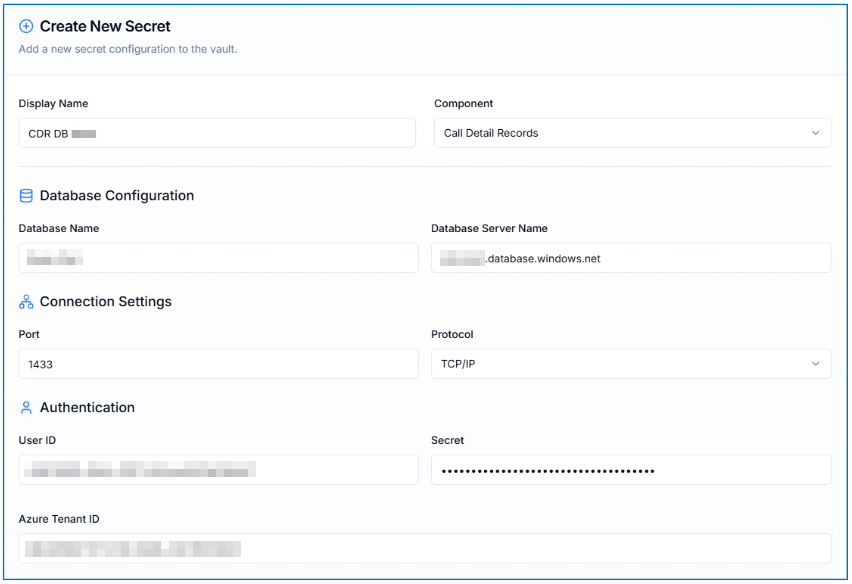
Enter the requested details

-
Display Name, for easy recognition of this profile (this name shows as a selector box in other menu's)
-
Component, select for which component to add a SQL configuration for, choose from:
-
Call Detail Records (only when a customer-owned CDR Call Detail Records (CDR) are the meta data of a converstation: who talked to whom, at which time, for how long and with which identity among other things (skill, optional classification, etc) which gets stored in your SQL (analytical) database. database is used by UCC A Unified Contact Center, or UCC, is a queue of interactions (voice, email, IM, etc.) that are handled by Agents. Each UCC has its own settings, IVR menus and Agents. Agents can belong to one or several UCCs and can have multiple skills (competencies). A UCC can be visualized as a contact center “micro service”. Customers can utilize one UCC (e.g. a global helpdesk), a few UCC’s (e.g. for each department or regional office) or hundreds of UCC’s (e.g. for each bed at a hospital). They are interconnected and can all be managed from one central location. Core, Call Classifications, and Universal Timeline services)
-
Dialogue Manager (transactional database for all text-based applications)
-
WebAgent (for persistent storage of Agent and Supervisor's personal WebAgent settings)
-
| Field | Description |
|---|---|
| Database Name | Name of the database |
| Database Server Name | Name of the database server |
| Port (default is 1433) | 1433 |
| Protocol (default is TCP/IP) | TCP/IP |
| User ID | Client ID of Azure App Registration |
| Secret | Client Secret of Azure App Registration |
| Azure Tenant ID | Azure Tenant ID (found in Entra overview) |
For Example:
-
When done, select Create Secret.
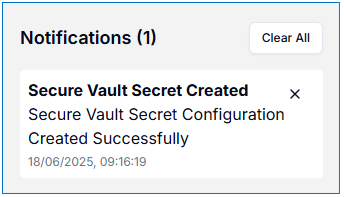
-
A notification will appear telling you a Secure Vault secret has been created
Note
It can take up a few seconds before the secrets are shown in the vault.
-
When you Edit your Secure Vault, you can view and manage all your secrets.
The screen will look like below:
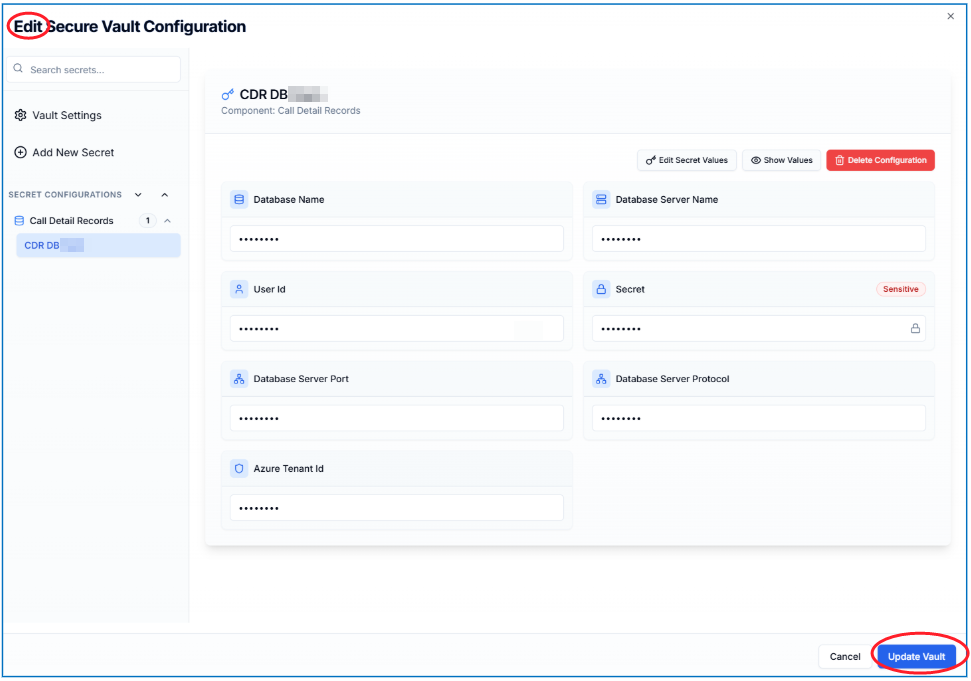
From this screen, you can View or Edit the values or Delete the Secret Configuration.
Also, you can add more Secrets via the Add New Secret on the left (e.g. to add a Dialogue Manager or WebAgent Settings database Secret Configuration).
Once ready, you can enable that specific Secret profile to your specified application and service. See examples below.
Connect a customer-owned CDR database
Use this section only when the deployment includes a customer-owned CDR database. It does not apply to Dialogue Insights, which uses CDR data hosted in Microsoft Fabric.
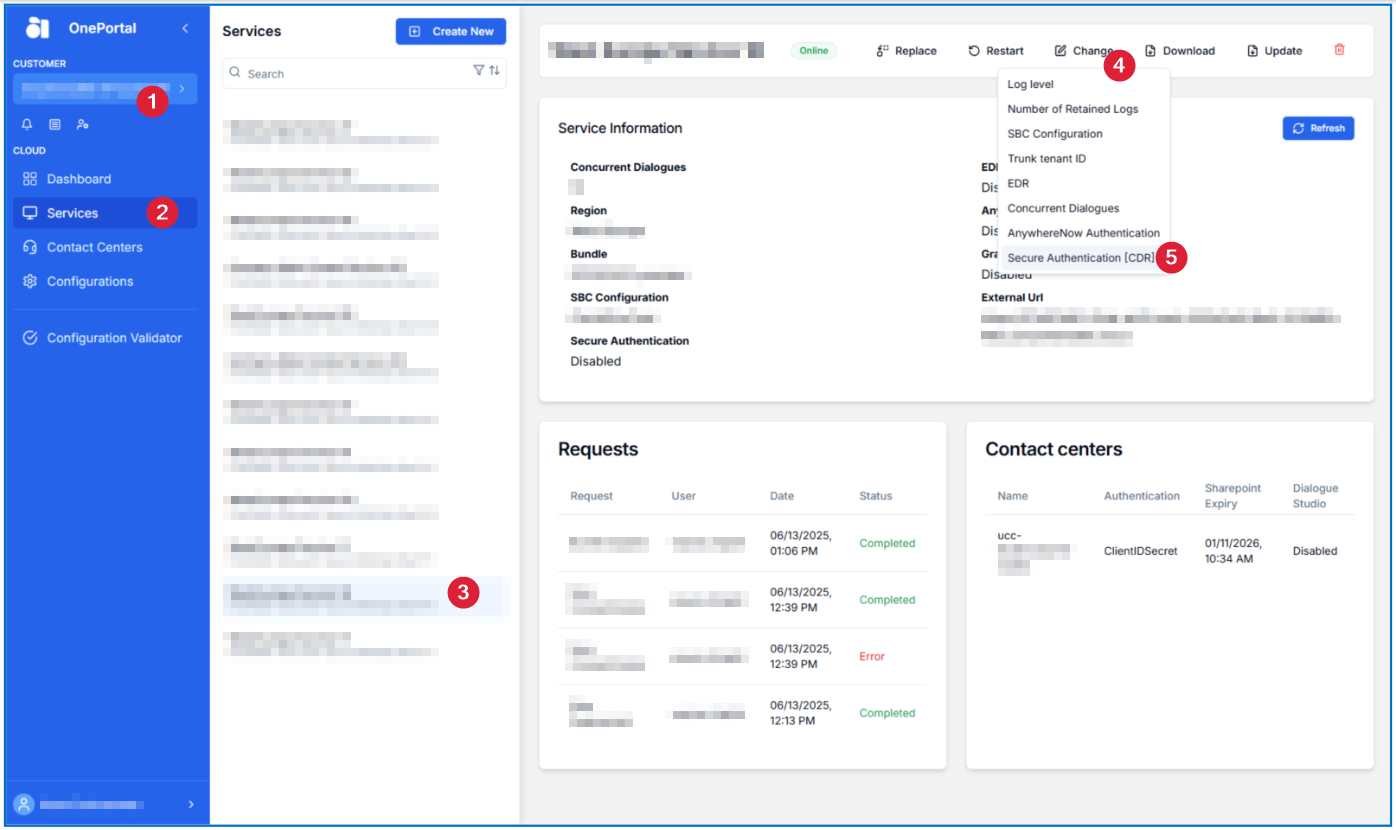
-
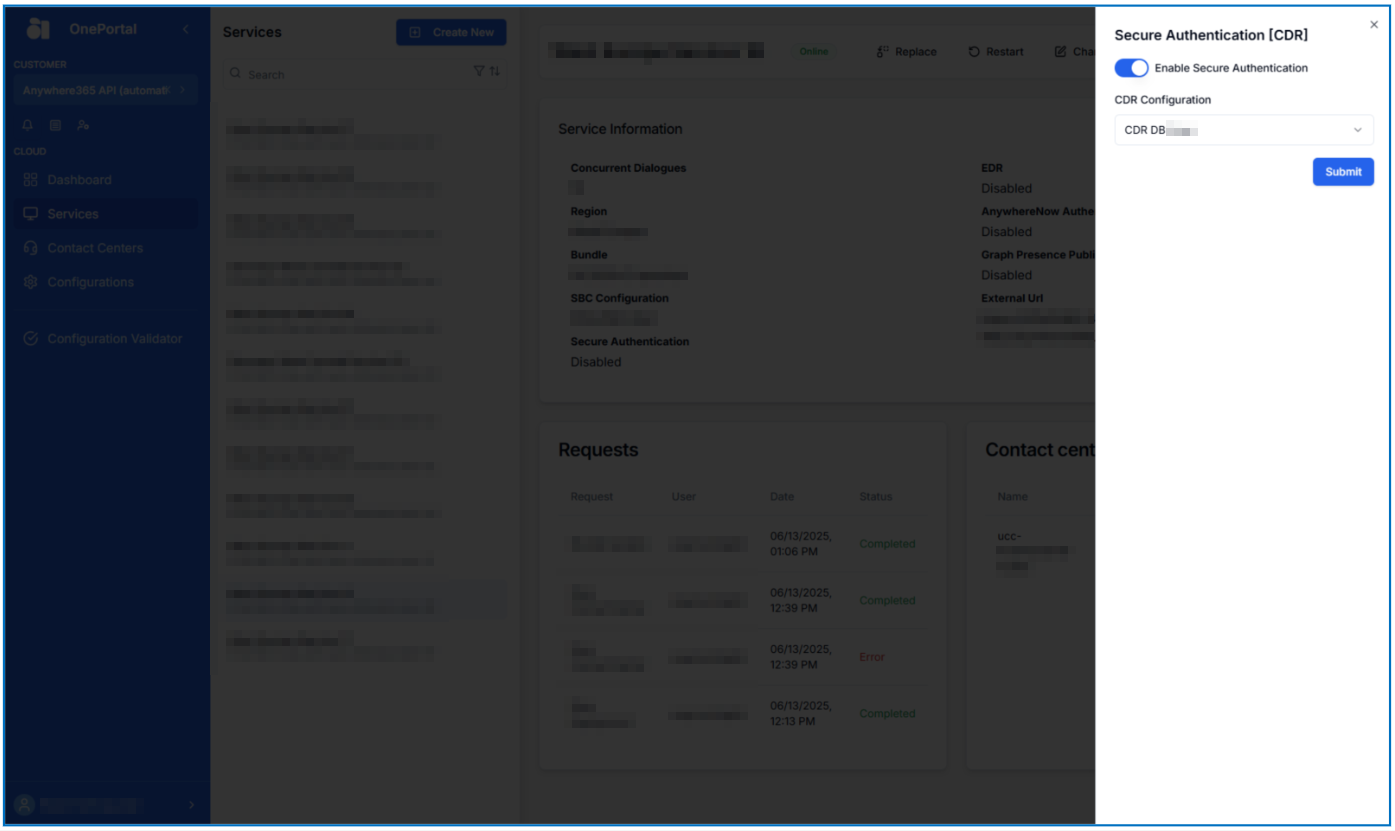
Go into your desired Service and select Change and then Secure Authentication [CDR]
-
Once the side bar opens, you can toggle the Enable Secure Authentication and select a database Secret profile name.
-
Once selected, click submit.
How to Connect Dialogue Manager DB
-
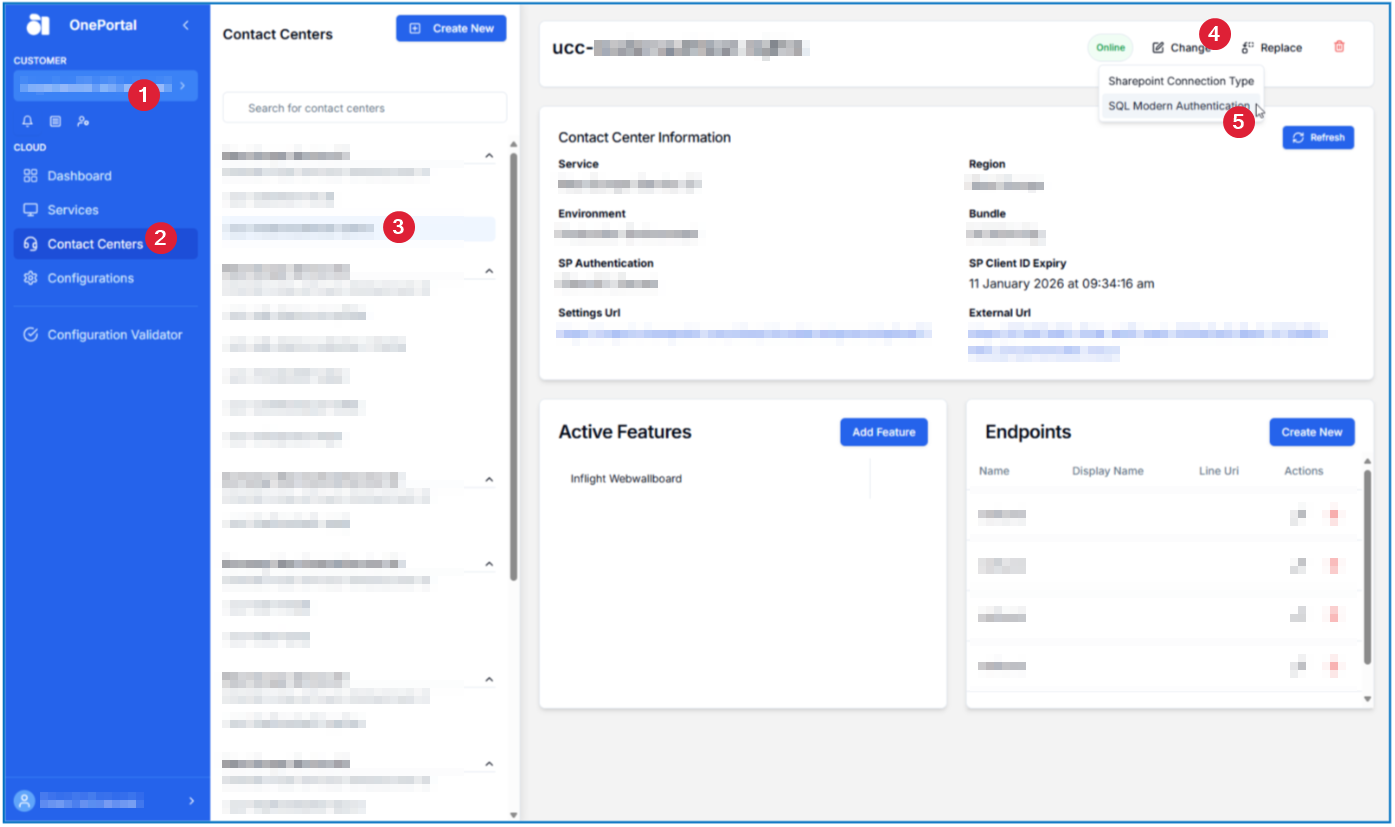
Go into your desired Contact Center and select Change and then SQL Modern Authentication
-
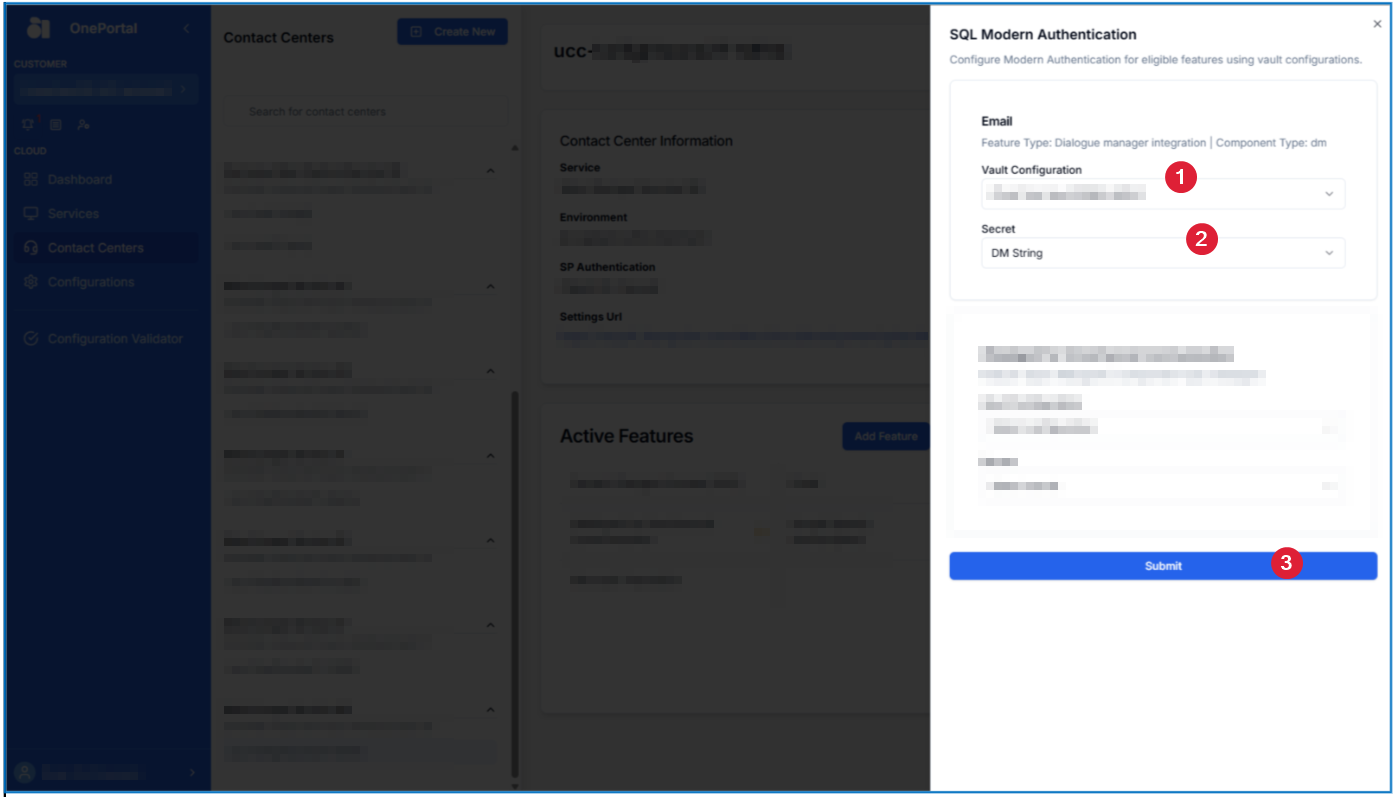
Once the side bar opens, you can select the Vault Configuration you created for this specific Dialogue Manager type (like Email) and select the Secret profile your set up for it.
-
When ready, click Submit.
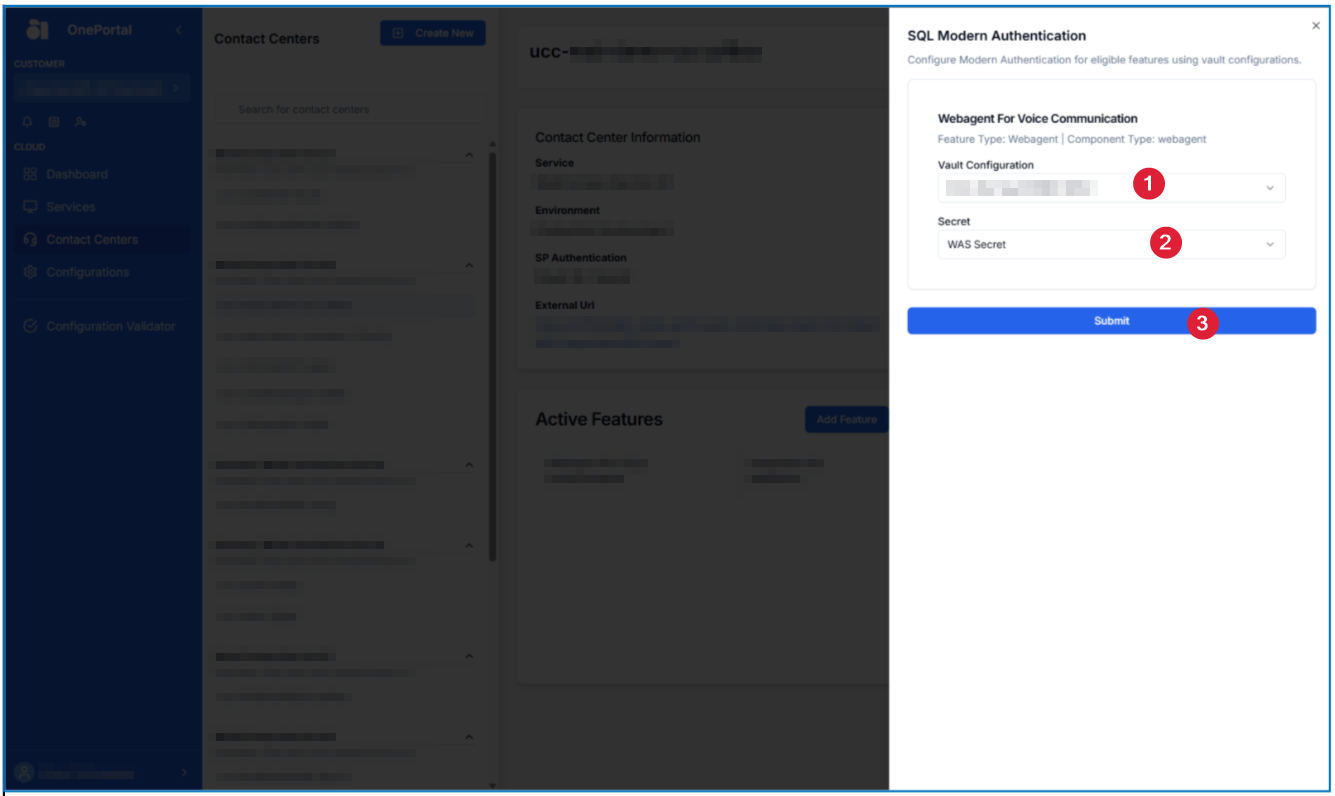
How to Connect WebAgent settings DB
-
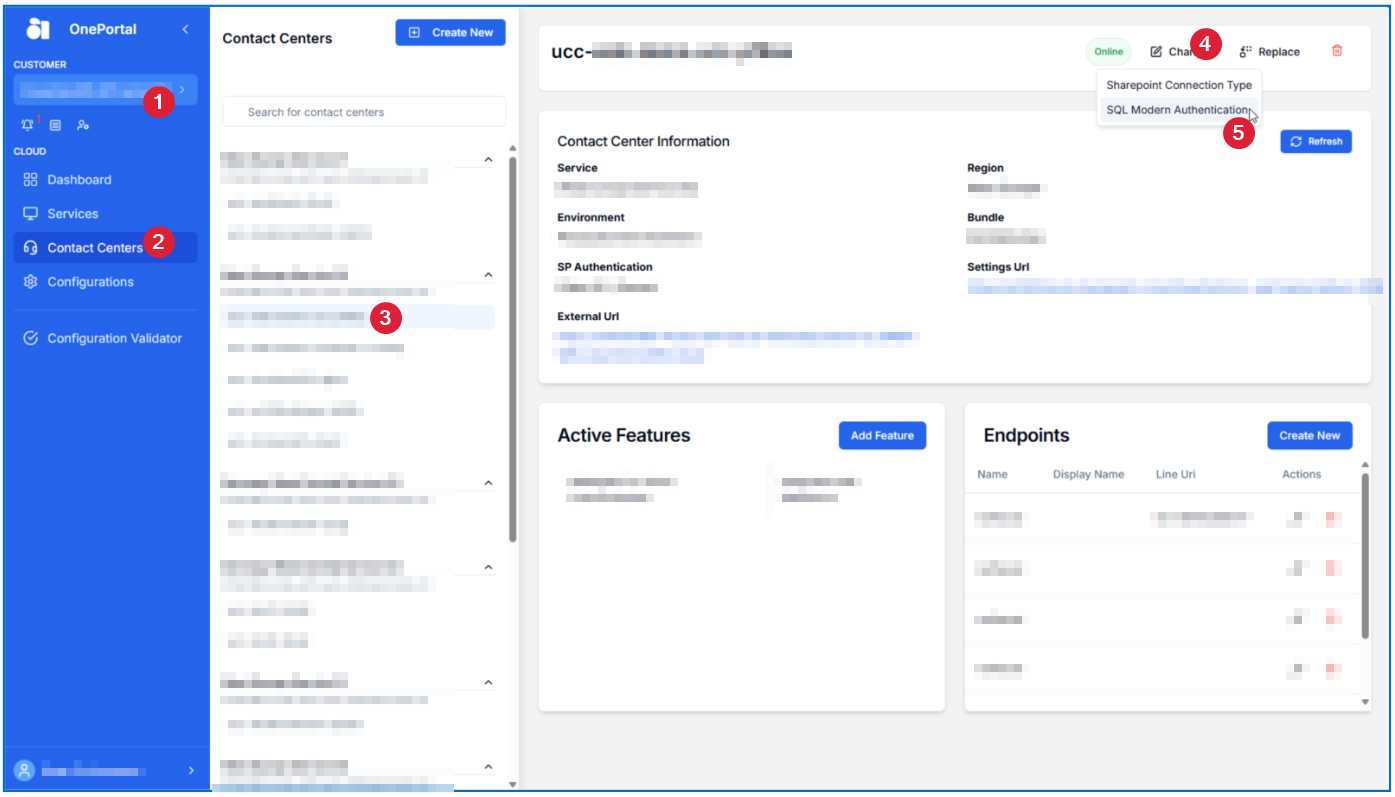
Go into your desired Contact Center and select Change and then SQL Modern Authentication
-
Once the side bar opens, you can select the Vault Configuration you created for this specific WebAgent setting DB type and select the Secret profile you set up for it.
-
When ready, click Submit.
Next Steps
-
After the secure profiles have been created and assigned a UCC service restart with cleared cache is required to wipe the cached SharePoint settings involved.
-
Once all configured functionality using this new authentication method has been verified and tested, such as customer-owned CDR database access, Call Property, Universal Timeline, Dialogue Manager, and WebAgent settings per agent, remove all references to the plain text connection strings from your SharePoint sites.