Install Snapper for Microsoft Teams
Preparation
Before starting the installation, make sure the following preparations are taken on the device that will run the Snapper:
-
A supported version of Snapper is used. (See Bundle Release Notes )
-
Microsoft Office and Teams client is installed:
-
Make sure the latest Windows updates are installed.
-
Register Teams as the chat app for Office (Settings > General > Register Teams as the chat app for Office)
-
-
 Latest .NET Framework 4.x (minimum 4.6.2) is required
Current Windows 10 and Windows 11 already comes with .NET framework 4.8.x pre-installed)
-
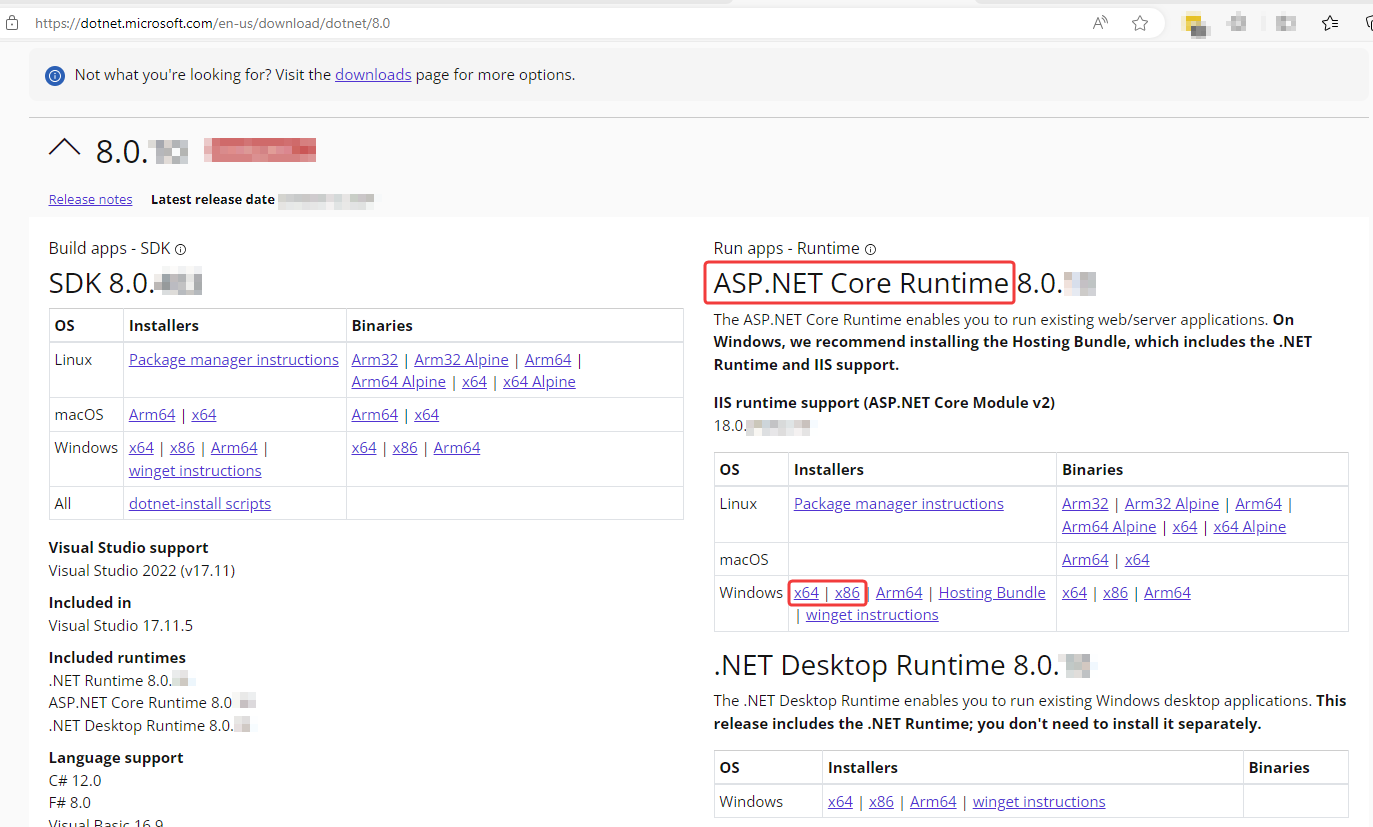
Latest Microsoft ASP.NET Core Runtime and .NET Desktop Runtime are required and installed.
Microsoft .NET 6.0 has reached End-Of-Life. See: https://dotnet.microsoft.com/en-us/download/dotnet/6.0
Any Snapper running on the .NET 6.0 library can hereby no longer be supported. Upgrading to a Snapper running on a .NET 8.0 version is strongly advised.
Snapper versions bundled with DC2024.02 or higher are built on Microsoft .NET 8.0.x
Download latest version 8.0 from Microsoft site: https://dotnet.microsoft.com/en-us/download/dotnet/8.0
Bit-level version should match the version of Snapper installer (x64 or x86)
 and
and 
-
User is logged in.
-
Minimal Screen Resolution 1920 x 1080 (scaling not higher than 150%)
(Optional) If you want to save your screen recordings to SharePoint, you will have to create the following document libraries within the UCC A Unified Contact Center, or UCC, is a queue of interactions (voice, email, IM, etc.) that are handled by Agents. Each UCC has its own settings, IVR menus and Agents. Agents can belong to one or several UCCs and can have multiple skills (competencies). A UCC can be visualized as a contact center “micro service”. Customers can utilize one UCC (e.g. a global helpdesk), a few UCC’s (e.g. for each department or regional office) or hundreds of UCC’s (e.g. for each bed at a hospital). They are interconnected and can all be managed from one central location. settings page:
Note
If the provided credentials have permissions to create document libraries on the SharePoint site, they will be created automatically upon first use.
- InboundScreenRecordings
- OutboundScreenRecordings
When the above preparations are completed, the installation can be continued.
Installing the Snapper
Snapper install needs to match the same bit-level as the Teams client (32-bit or 64-bit)
The following steps describe the installation process of the Snapper.
-
Run the Setup.msi file to start the setup program.
Note
Installation files can be obtained from an authorized Partner or your regular AnywhereNow contact.
(When receiving the installer as a .zip file please check whether the file is “Unblocked” in the file properties BEFORE extracting the installer)
-
Click “Next”
-
Read and accept the License Agreement by checking the “I accept the terms in the License Agreement” box.
-
The following screen will display the available features:
- Always install the “Anywhere365 Snapper (xx bit)”.
-
Click “Next”
-
Select Client Type
- Teams (When connected to Dialogue Cloud over Microsoft federation When using AnywhereNow in combination with Federation you can add agents working with a Skype for Business or Teams account to your UCC.)
- Teams Direct Routing (When connected to Dialogue Cloud using Direct Routing)
Introduced in DC2024.01
-
(Optionally) Fill in the Teams client id, Learn More
-
Click “Install”
-
The Snapper will now be installed
-
Select “Finish” to close the setup
-
Run the shortcut to start the Application
Configure the Snapper
The Snapper has an auto-discovery feature, so you only need to add 1 UCC.
- Start the Snapper
- Open Settings button on the main toolbar (bottom)
- Open tab UCC Config
- Click Add UCC
- Enter the information:
- UCC Name = ApplicationId of the UCC
- UCC Host = FQDN FDQN stands for Fully Qualified Domain Name and specifies the exact location in the tree hierarchy of the Domain Name System (DNS). An example for [hostname].[domain].[top level domain] is [www].[microsoft].[com] of UCC
- Secure = Which protocol should be used. http:// or https://
- (Optional) Autodiscover = Automatically add other UCC's where the user is an Agent or Supervisor (leave disabled if you are only agent in one UCC or want to only see one UCC)
- Click on save
Configure the Snapper for Teams (if not already done during Installation)
-
Start the Snapper
-
Open the Menu tab
-
Change the setting "Client Type" to:
- Teams (When connected to Dialogue Cloud over Microsoft federation)
-
Teams Direct Routing (When connected to Dialogue Cloud using Direct Routing)
Introduced in DC2024.01
-
Optionally Fill in your own Teams client id, Learn More (else the AnywhereNow global microsoft Entra ID Formerly known as Azure Active Directory (or Azure AD, or AAD) Enterprise App (AnywhereNow Snapper Teams - PROD) will be used)
-
Restart the Snapper
Signing into Microsoft Teams
Next time you start the Snapper, you will be prompted to sign-into your Microsoft Account.
Tip
If you ever need to switch accounts, you need to delete: