Dialogue AI Assist Voice Channel User Guide for Assistant Editors
Note
Dialogue AI Assist add-in features in WebAgent require an additional Deepdesk license from AnywhereNow.
Introduction
As an Assistant Editor, you will play a crucial role in the content available to your agents. We recommend that you read through the Dialogue AI Assist User Guide for Agents first to gain an understanding of how the different features you will maintain are used. You may also want to go through the tutorial or test things in the playground as you make changes.
Accessing the Deepdesk Dashboard
To access the Deepdesk Dashboard, please go to the following URL: https://[account].deepdesk.com. Please note that the exact URL is unique for your organization. For the exact URL, please reach out to your AnywhereNow representative.
Assistant Editor's Deepdesk Dashboard
The main role of a Deepdesk Assistant Editor is to maintain the content that is made available to the agents. In other words, the Assistant Editor ensures that Assistants perform the best support to agents and that the content of the Knowledge Assistants is always up to date.
Generative AI
The Generative AI section is where you can configure various settings regarding Assistants.
Assistants
Deepdesk Assistants can be used to manage and evaluate GenAI-powered assistants that are integrated with your CX Platform. These assistants leverage advanced artificial intelligence to enhance customer interactions, streamline workflows, and provide valuable insights into customer behavior. Whether it's answering customer questions, automating repetitive tasks, or providing real-time decision support, Assistants make interactions faster, more accurate, and more personalized.
This guide will help you create assistants in Deepdesk Studio with prompt instruction examples.
Assistant Configuration Fields
Assistant Name and Code

Choose a name and a code for your assistant. This is how you'll identify it later across different tools.
Note
The code needs to be unique for each assistant.
Assistant Instructions
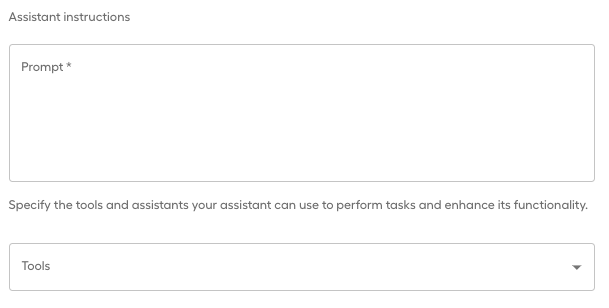
Prompt
Give your assistant clear and specific instructions. Depending on the task, describe how to interpret input, what you want the Assistant to do, what you expect from an answer, or how to call tools. It is always good to include some example responses as well.
Tools
Select any other tools or assistants that your assistant can use to get tasks done and be more useful.
Assistant Settings
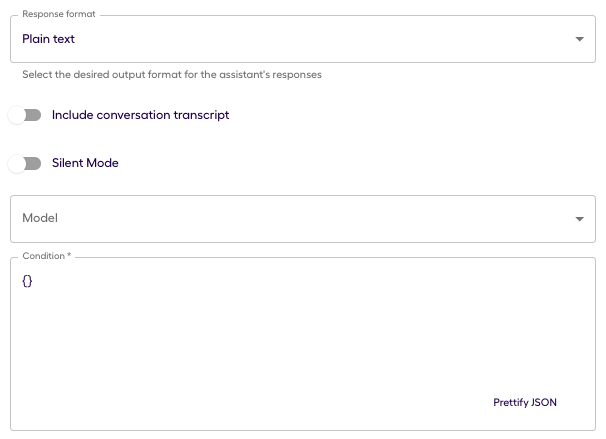
Response Format
Get the assistant's response in a structured format that's easy for other systems to read and use. You can choose between:
-
Plain Text
-
JSON Object
-
JSON Schema
-
Cues - required response format when you want the assistant to appear as a cue within the Dialogue AI Assist widget.
-
Knowledge Assist - required response format when call_knowledge_assist is used.
-
Toggles
-
Include Conversation Transcript: When enabled, the assistant will retrieve the conversation from the database and include the transcript in the prompt.
-
Silent Mode: When enabled, the assistant will perform its tasks without any visible output to the chat. This is useful for silencing the chatbot-style assistants that are customer-facing.
Model
Can be chosen from the list provided based on the LLM deployments that the customer has.
Condition
If there are any conditions for your assistant to work, they can be included in JSON format inside the condition field.
For example, if we need to validate the source_id for the conversation before evaluating the assistant, the condition can be:
Assistant Description and Parameters
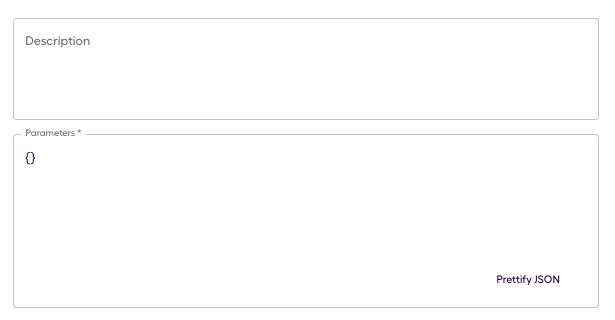
Description
If an Assistant is going to be called by other assistants as a tool, you will need to provide a description. This helps the LLM to understand what the Assistant’s task is and if it’s useful to request it to perform its task.
Parameters
You can include any parameter that is useful or required as an input for this assistant to work.
For example, if we need to validate the source_id for the conversation before evaluating the assistant, the condition can be:
{
    "type": "object",
    "required": [
        "source_id"
    ],
    "properties": {
        "call_recommended": {
            "type": "string",
            "description": "The source_id of the interaction."
        }
    }
}
Conversation Assistant Operators
We have operators that can be triggered during different phases of a conversation to call different sets of assistants: when a conversation gets accepted by the agent, when there are new incoming messages in the conversation, when a conversation ends, and when a summary is needed for the conversation.
Each profile can have its own set of assigned assistants under Admin Settings → Profile → Settings:
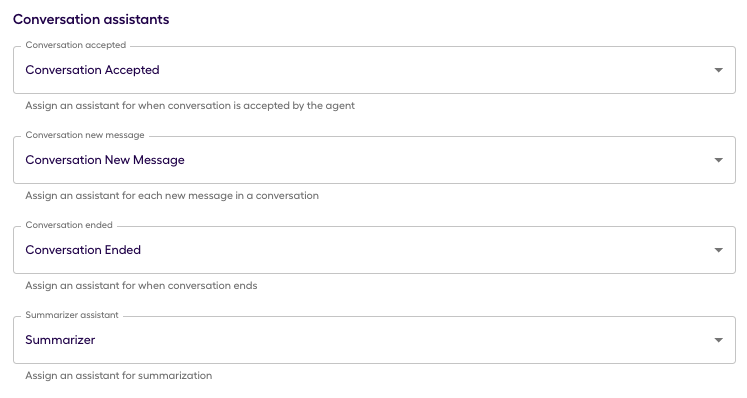
Configuring a Conversation Assistant Operator
-
Prompt for
conversation-accepted,conversation-new-message, andconversation-endedoperators look like the following:CopyPrompt# Task
You are a helpful assistant supporting a customer service agent during an interaction.
Use the full transcript and assistant descriptions provided to determine if calling one of the available assistants is necessary. Only call an assistant if it is highly relevant.
Available Assistants:
--list of the assistants that we want to call when the conversation is accepted.
If you lack the parameters required to call an assistant, skip it. Do not ask for missing parameters. Call each assistant only once and provide a single response for each assistant. Avoid multiple or duplicate responses per assistant.
Use only the assigned assistants; do not create new ones. If an assistant has previously provided a comparable response, reuse the older one.
Exclude any responses from assistants that are "none," "{}", or equivalent. If a response seems irrelevant, omit it.
If an assistant's response contains markdown, keep that intact.
If none of the assistants seems relevant, or none have relevant output, say: "[]".
Return the results as a list of objects with these keys:
`code`: The function name
`name`: The assistant's name
`response`: The assistant's text response
# Examples:
Example 1: Three assistants were called; two responded with "none," and one provided a useful response:
[
{
"code": "my-assistant",
"name": "My Assistant",
"response": "The client, John Smith, is experiencing issues with their wifi. They have tried resetting their router, but none of their devices can connect to the wifi network. They have provided their address as `123 Main Street`."
}
]
Example 2: Four assistants were called; two responded with "none," and two provided useful responses:
[
{
"code": "how-to-assistant",
"name": "How-to Assistant",
"response": "The client, John Smith, is experiencing issues with their wifi. They have tried resetting their router, but none of their devices can connect to the wifi network. They have provided their address as `123 Main Street`."
},
{
"code": "sentiment-assistant",
"name": "Sentiment Assistant",
"response": "The sentiment is neutral."
}
]
-
Tools should include the assistants listed under “Available Assistants” in the prompt. More than one assistant can be assigned here.
-
Under assistant settings, this operator should have the JSON Schema → Cues selected and have the “Include conversation transcript” toggle enabled.
-
The model can be determined based on the LLM deployments that the customer has.
-
Condition, description, and parameters can be left empty as
{}since these conversation assistant operators will not be called by other assistants.
Configuring Summarizer Assistant
Per each profile, you can assign a dedicated summarizer assistant, provide the instructions, and enable the “Include conversation transcript” toggle for the assistant to work.
Using API with Assistants
APIs allow Assistants to interact with other systems, retrieve or send data, or trigger actions, extending the Assistant’s capabilities. Configure APIs and default headers like authentication headers, so you can make secure calls using the call_api and call_deepdesk tools.
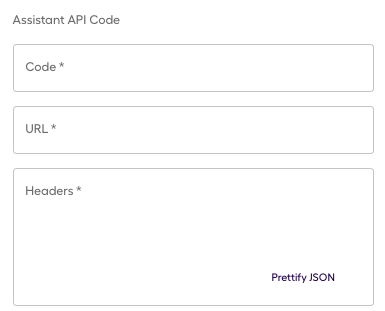
Assistant API Code
Code
Choose a code for your assistant API. This is how you'll identify it later across assistants. The code needs to be unique for each assistant API.
URL
Configure the base URL required for each call.
Headers
Configure the headers required for each call. Headers are stored encrypted, so it’s safe to add tokens here.
There are three methods to authenticate APIs:
- No Auth
- OAuth2
- Token URL
- Client ID
- Client Secret
- Scope (optional) needs to be added for this method.
- Auth Headers
- Authentication headers need to be added for this method.
Using Tools with Assistants
You can add several tools to work with your assistant. There are some predefined tools that require specific prompt instructions to be added to be called from your assistant.
call_urlcall_apicall_deepdeskcall_knowledge_assistvalidate
call_url
If you need to make a call to a URL, add the call_url as a tool for your assistant and add the following instructions inside your prompt:
Call the call_url tool:
- url: ##http://some.url.com/api/path
- method: ##the type of action you want to perform on the API server, e.g. GET
- headers: {"Authorization": "Bearer token"} ##if you do not need headers, this line can be deleted
- payload: ##any additional parameters that you want to include in the request.
call_api
If you need to make a call to an external API, add the call_api as a tool for your assistant and add the following instructions inside your prompt:
Call the call_api function:
- path: ##the path of the endpoint, optionally with query parameters
- api_code: ##the unique code of the API you want to call
- method: ##the type of action you want to perform on the API server, e.g. GET
- headers: {"Content-Type": "application/json"} ##if you do not need headers, this line can be deleted
- payload: ##any additional parameters that you want to include in the request.
Note
An Assistant API should be created with the corresponding api_code to use this tool.
Call the call_api function:
- path: 1.0/interactions/{customer_id}/save_summary
- api_code: crm_interactions
- method: POST
- payload: {“interaction_summary”: “{summary}”}
call_deepdesk
If you need to make a call to a Deepdesk API, add the call_deepdesk as a tool for your assistant and add the following instructions inside your prompt:
Call the call_deepdesk function:
- path: ##the path of the endpoint, optionally with query paramaters
- method: ##the type of action you want to perform on the API server, e.g. GET
- headers: {"Deepdesk-Header": "foo"} ##if you do not need headers, this line can be deleted
- payload: ##any additional parameters that you want to include in the request.
Note
An Assistant API should be created with the corresponding api_code to use this tool.
Call the call_deepdesk function:
- path: /api/events
- api_code: deepdesk
- method: POST
- payload: { "conversation_id":{platform_conversation_id},"name": "Assistant Custom Insights", "data": { "customer_sentiment": "positive/neutral/negative"}}
call_knowledge_assist
If you need to make a call to a Deepdesk knowledge assist, add the call_knowledge_assist as a tool for your assistant and add the following instructions inside your prompt:
Call the call_knowledge_assistant function. Always include all parameters.
- assistant_code: ##code of the Knowledge Assistant configured within Deepdesk
- question: {customer_question}
- conversation_id: {internal_conversation_id}

Reply only using the response, and avoid using general knowledge.
Avoid phrases like 'For more information, you can visit...'
If the function responds with "I don't know." then say "I don't know".

Always respond with the following JSON format:
{
    "response": <the response from call_knowledge_assist>,
    "sources": [
        {"name": <name of the source>,"url": <url of the source>}
    ]
}Call the call_knowledge_assistant function. Always include all parameters.
- assistant_code: corendon-product
- question: {customer_question}
- conversation_id: {internal_conversation_id}
- chat_history: a list of objects with this format {"question": "string", "answer": "string"}, create this list from assistant thread messages
Reply only using the response, and avoid using general knowledge. Avoid phrases like 'For more information, you can visit Corendon.'
Always respond with the following JSON format:
{
"response": <the response from call_knowledge_assist>,
"sources": [
{"name": <name of the source>, "url": <url of the source>}
]
}validate
If you need to validate a set of data as part of your assistant's instructions, add the validate as a tool for your assistant and add the following instructions inside your prompt:
Call validate function with the following logic and data:
- logic: ##needs to be JSON logic
- data: ##needs to be JSON logicCall validate function with the following logic and data:
- logic: {"==": [{"var": "result"}, "200 OK"]}
- data: {"result": <call_api response>}Additional Assistant Cue Formats
call_to_action
Call to action is an event listener for the assistants. The response value can be passed with the following format when included as instructions inside the prompt. This will also result in cues with call_to_action links.
[
    {
        "code": "my-assistant",
        "name": "My Assistant",
        "response": <response>
        "call_to_action": { "label": "This is the call_to_action", "event": "my-assistant-called", "value": "{response}"}
    }
]
Knowledge Assistants
Deepdesk Knowledge Assistants can be used as a source with your own data to provide useful information to users. The sources can be online resources like URLs, PDF sources you can upload, or you can upload directly via the API.
This guide will help you create knowledge assistants in Deepdesk Studio with prompt instruction examples.
Knowledge Assistant Configuration Fields
Knowledge Assistant Name and Code

Choose a name and a code for your knowledge assistant. This is how you'll identify it later across different tools.
Note
The code needs to be unique for each assistant.
Prompt Instructions

Instructions for the Knowledge Assistant on how to answer
Give your knowledge assistant clear and specific instructions.
Use the following pieces of context to answer the user's question. If you don't know the answer, just say that you don't know, don't try to make up an answer.Instructions for the Knowledge Assistant respond in case it cannot provide a direct answer
Give your knowledge assistant instructions if they don't have the answer.
Source Processing
Source Processing involves scanning and analyzing the online sources or PDFs you've added. This function extracts and comprehends information from these sources, enabling the Knowledge Assist feature to generate relevant responses. The duration depends on the size and complexity of the sources. Once complete, any changes to the sources will necessitate a new round of processing. You can start this process by clicking on 'Start Processing'.
Knowledge Assist Sources
Online Sources
Add URLs of publicly available sources, like your website or community page. Add one URL per line.
PDF Sources
These PDFs are exclusively accessible to Deepdesk users and cannot be shared or viewed by external parties, such as customers. Drag PDFs into the window to upload.
API
These documents have been uploaded via the API